Saltwater Damage Phone Speaker Fix: What to Do Before Corrosion Sets In
Saltwater in your phone speaker is a different problem from a regular splash. Here’s why salt is uniquely damaging, how much time you really have, and the right steps to save your speaker — plus a video guide.
Focus keyword: saltwater damage phone speaker fix
Secondary keywords: ocean water phone speaker, saltwater corrosion phone, fix speaker after beach, salt residue speaker, remove saltwater from phone
Introduction: Why Saltwater Feels Different From the Start
Anyone who has dropped a phone in a lake, a sink, or a sudden rain shower knows the moment of panic that follows. But there is a specific, extra layer of dread that comes with saltwater — a wave at the beach, an accidental dunk off a boat, a splash while swimming in the ocean. Even before you know the technical reasons why, something in the back of your mind says this one is worse. That instinct is correct.
Saltwater does not merely muffle a speaker the way plain water does — it introduces sodium chloride, a compound that does not simply evaporate away like water does. Left unaddressed, it can crystallize inside the speaker chamber and around delicate electrical contacts, creating problems that go well beyond a temporarily blocked grille. The encouraging part is that a fast, correct response still saves the vast majority of saltwater-exposed phones. This guide walks through exactly why salt behaves differently, what to do in the critical first hour, and how to actually restore clear sound afterward.
Saltwater introduces a chemical problem, not just a physical one — which changes how quickly you need to act.
Why Saltwater Is a Different Category of Problem
Salt Doesn’t Evaporate — It Crystallizes
When plain water dries, it simply leaves the area, taking any dissolved impurities along in trace amounts. Saltwater behaves very differently. As the water evaporates, the dissolved sodium chloride stays behind and forms solid crystals wherever the liquid was sitting — including deep inside a speaker’s tiny mesh openings and around any exposed metal contacts nearby.
Salt Crystals Conduct Electricity
This is the part that makes saltwater genuinely more dangerous than a regular splash. Dry salt residue can still conduct a small electrical current under the right conditions, meaning it can create unintended pathways between components that were never meant to be electrically connected. This is a direct route to short circuits and corrosion that does not apply to plain water exposure in the same way.
Corrosion Accelerates Dramatically
Metal contacts and solder points exposed to saltwater begin oxidizing much faster than with fresh water. What might take several days to become a visible problem with plain water can start showing signs of corrosion within the first 24 hours when salt is involved.
The Damage Can Be Delayed
One of the trickiest aspects of saltwater exposure is that a phone can seem to recover initially — sound partially returns, the device works normally for a day or two — only for problems to reappear later as residual salt continues causing slow-building corrosion in the background. This delayed pattern catches a lot of people off guard.
Unlike plain water, salt does not fully evaporate — it leaves behind crystalline residue that can conduct electricity and accelerate corrosion.
The First Hour: What Actually Matters Most
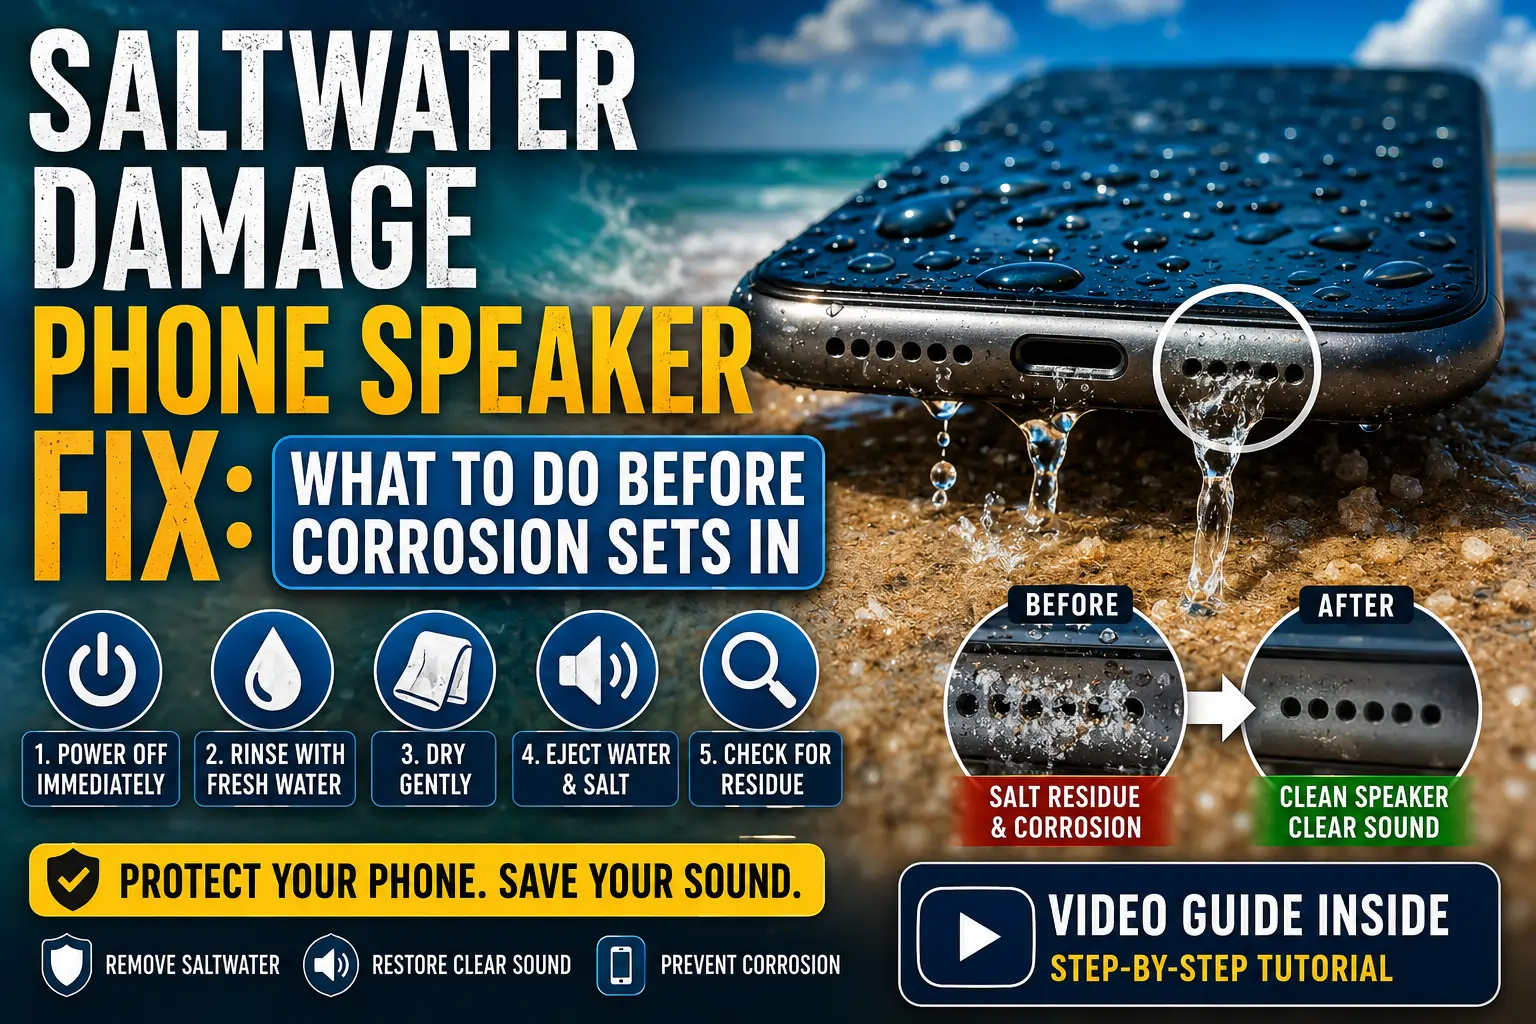
Step 1: Get the Phone Out and Power It Off Immediately
Do not wait to see if it is “still working.” If there is any current running through the device while saltwater is present, that is the exact scenario that leads to a short circuit. Powering off first is the single most important early step.
Step 2: Rinse With Fresh Water — This Is Not Optional for Saltwater
This is the step people most often skip out of instinct, since adding more water feels wrong. But with saltwater specifically, a brief, gentle rinse under a slow-running tap helps dilute and remove the salt before it has a chance to dry and crystallize in place. Avoid full submersion again; a light rinse focused on the speaker grille and exposed areas is enough. Skipping this step is one of the most common reasons saltwater exposure turns into long-term corrosion.
Step 3: Dry the Exterior Gently
Use a soft, absorbent cloth to pat down the outside of the phone, paying particular attention to the speaker grille, charging port, and any seams or buttons.
Step 4: Let It Rest Before Powering Back On
Give the phone at least 20–30 minutes sitting speaker-down on a dry towel in a ventilated area before attempting to turn it back on.
Step 5: Check for a Liquid Damage Indicator
Many phones include a small white sticker inside the SIM tray or near the battery that turns pink or red on contact with liquid. If yours has changed color, it confirms water reached the interior — useful information for judging how cautious to be going forward, even though it does not change the immediate steps.
Restoring Sound: Clearing Trapped Water and Salt Residue
Once the phone has rested and you are confident it is safe to power back on, here is how to work on the speaker itself.
Step 1: Power the Phone Back On Carefully
If it turns on normally without unusual warmth or behavior, you are clear to continue.
Step 2: Remove the Case Completely
A case can trap residual moisture and salt against the speaker grille rather than letting it clear.
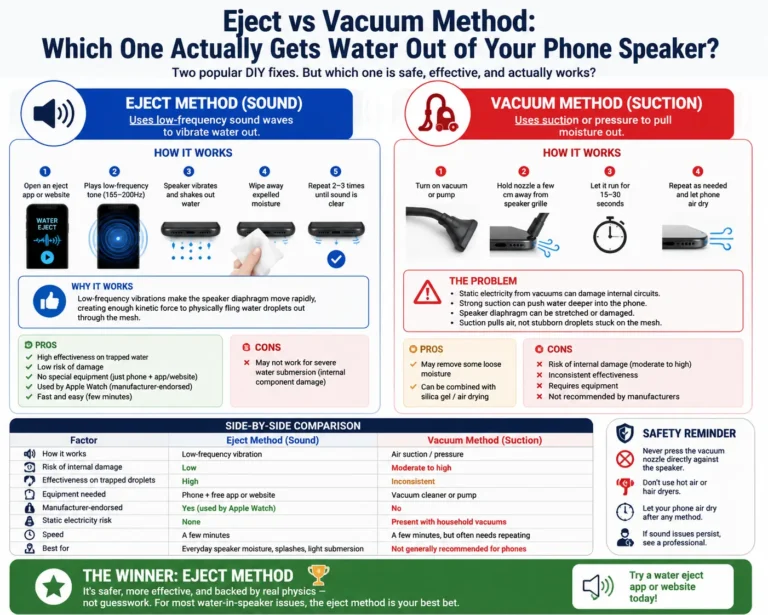
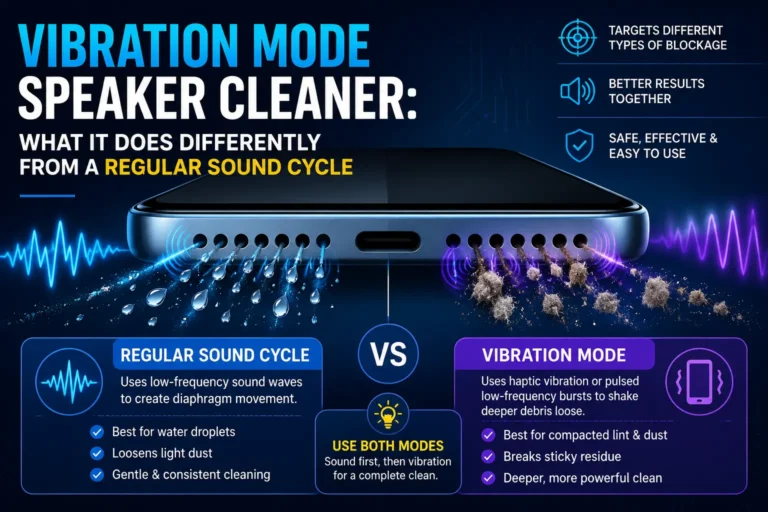
Step 3: Run a Low-Frequency Water Ejection Sound
A calibrated low-frequency tone, often cited around 165 Hz, vibrates the speaker diaphragm strongly enough to push out trapped droplets. This step matters just as much for saltwater as for plain water, since any liquid still sitting in the mesh will otherwise dry in place and leave residue behind.
To run this properly:
- Set volume to maximum.
- Tilt the phone so the speaker faces downward over a paper towel or soft cloth.
- Play the tone for 30–60 seconds.
- Look for visible droplets pushed out onto the towel.
Step 4: Repeat Multiple Cycles
Saltwater exposure often benefits from three to five cycles rather than just one or two, since the goal is to eject as much liquid as possible before any of it has a chance to dry and crystallize.
Step 5: Inspect for Visible Salt Residue
After the phone sounds mostly clear, shine a flashlight at an angle across the speaker grille. Look for a white, crusty, or chalky film — this is a strong indicator of salt residue rather than simply remaining moisture.
Step 6: Gently Clean Any Visible Residue
If you spot crusty buildup, a clean, dry, soft-bristled brush swept gently in one direction can help lift it away. Avoid pressing hard or using anything sharp, since the diaphragm behind the grille is delicate and easily damaged.
Watch a Water Ejection Method in Action
Here is a demonstration of the sound-based ejection process, which is just as relevant for saltwater exposure as for a plain splash:
📺 Video: How to Remove Water & Fix Sound on Your Phone Speaker in 1 Minute
https://www.youtube.com/watch?v=wh8QJMXBNVY<iframe width=”560″ height=”315″ src=”https://www.youtube.com/embed/wh8QJMXBNVY” title=”How to Remove Water and Fix Sound on Your Phone Speaker” frameborder=”0″ allow=”accelerometer; autoplay; clipboard-write; encrypted-media; gyroscope; picture-in-picture” allowfullscreen></iframe>
How Much Time Do You Actually Have With Saltwater?
This is the single biggest difference between saltwater and a plain splash:
- The first few hours are genuinely critical. Rinsing with fresh water and drying promptly during this window dramatically reduces the amount of salt left to crystallize.
- Within 24 hours, corrosion can already begin appearing on exposed metal contacts if salt residue was not addressed early.
- Beyond 48–72 hours, the odds of some permanent corrosion affecting sound quality rise substantially, and no amount of later drying will reverse damage that has already occurred.
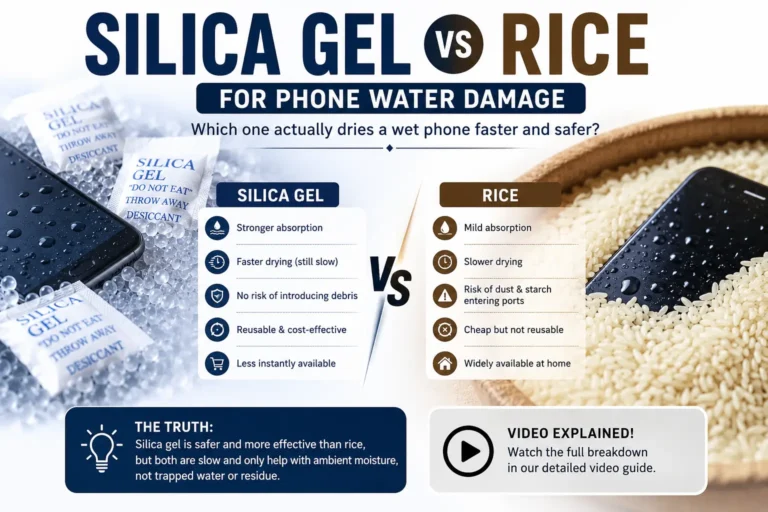
This tighter timeline is exactly why the usual “just leave it in rice for two days” advice is especially unhelpful for saltwater exposure — by the time a slow, passive method like rice has done anything meaningful, salt-driven corrosion may already be underway.
A brief fresh-water rinse is one of the few situations where adding water actually helps — specifically to dilute and remove salt before it crystallizes.
Signs the Damage Has Gone Beyond Simple Moisture
Even with a fast, correct response, it is worth watching for signs that something more than trapped water is involved:
- Sound improves, then gets worse again a day or two later — a classic sign of ongoing corrosion rather than lingering moisture.
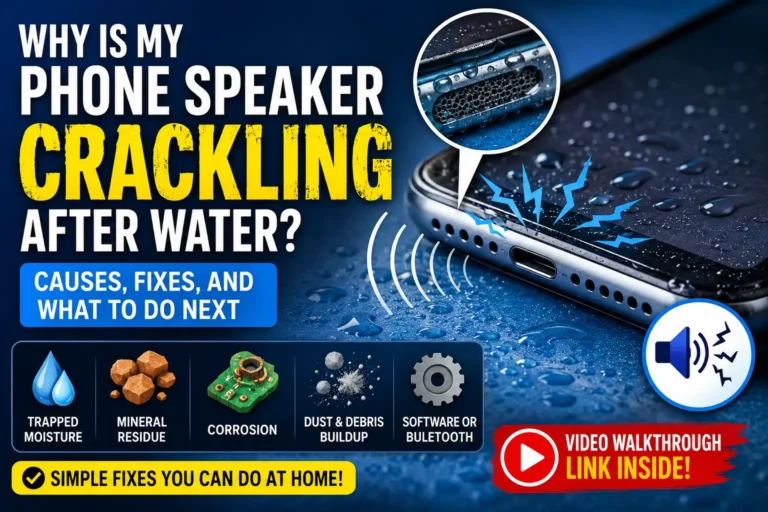
- Crackling that persists unchanged after 24–48 hours of proper rinsing, drying, and sound-based cleaning.
- Visible white, green, or crusty residue on the speaker grille or nearby components that does not clear with gentle brushing.
- Other symptoms appearing, such as charging issues, unusual warmth, or erratic behavior unrelated to sound.
If any of these apply, it is a reasonable point to stop further DIY attempts and have the device inspected, since continuing to test and experiment on a device with active corrosion can sometimes make the underlying damage worse.
What Not to Do After Saltwater Exposure
A few instincts that feel helpful actually work against you specifically with saltwater:
- Do not skip the fresh-water rinse. It is the single step most guides for plain water do not mention, and it is the one that matters most for saltwater specifically.
- Do not use heat. A hair dryer or direct sunlight can cause remaining salt to bake onto components rather than simply drying away, making later cleaning more difficult.
- Do not rely on rice. It is slow for plain water and does essentially nothing for the chemical residue that is the real long-term concern with saltwater.
- Do not use compressed air. High-pressure bursts can push salt residue and moisture deeper into the device rather than out.
- Do not keep testing the speaker every few minutes. Space out your checks rather than powering the phone on and off repeatedly while any residual moisture may still be present.
When to Get Professional Help
Saltwater exposure is one of the situations where professional inspection is worth considering sooner rather than later, particularly if:
- The phone was submerged for more than a few seconds rather than a quick splash.
- You were not able to rinse with fresh water promptly after the exposure.
- Sound quality is not steadily improving after rinsing, drying, and a few cleaning cycles.
- You notice any of the corrosion warning signs described above.
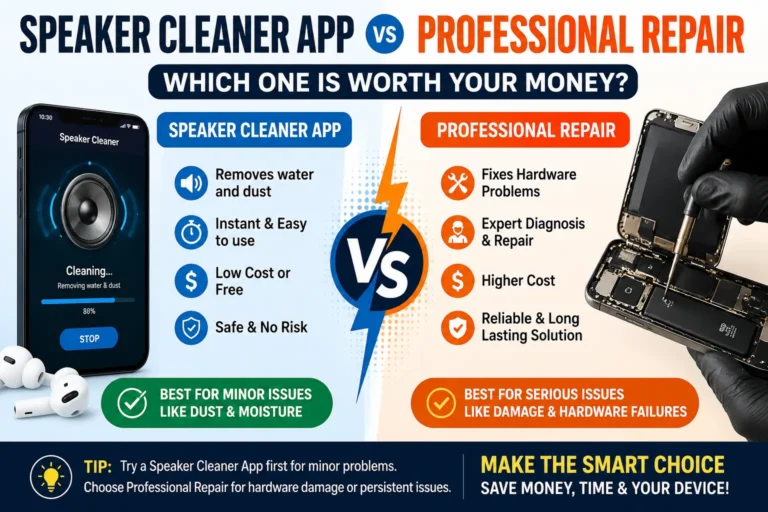
A professional repair can involve a proper internal inspection and, if needed, an ultrasonic cleaning process using isopropyl alcohol to remove corrosion from circuit boards — something a sound-based tool alone cannot fully replicate once corrosion has actually started.
Professional inspection can catch and address corrosion that has already begun, which home methods alone cannot fully reverse.
Preventing Saltwater Damage in the Future
- Use a dedicated waterproof pouch for any beach, boat, or ocean-adjacent activity, rather than relying on a phone’s general water resistance rating.
- Keep the phone in a bag or elevated spot away from the waterline rather than directly on a towel near the shore.
- Rinse your phone with fresh water immediately any time it is splashed by ocean spray, even if it was not fully submerged.
- Consider a phone case rated specifically for saltwater environments if beach or boating trips are a regular part of your routine.
Frequently Asked Questions
Is saltwater really worse than pool water for a phone speaker?
Yes, generally. Both introduce residue that plain water does not, but ocean saltwater typically carries a higher salt concentration than a chlorinated pool, making the crystallization and corrosion risk somewhat greater.
Why does rinsing with more water actually help after saltwater exposure?
The goal is not to add more overall moisture — it is to dilute and physically remove the salt before it dries and crystallizes in place. A brief rinse with fresh water achieves this specifically for salt-based exposure.
How long can my phone sit with saltwater inside before real damage happens?
Acting within the first hour or two — rinsing and drying promptly — gives the best outcome. Waiting beyond 24 hours without addressing the salt meaningfully increases the risk of lasting corrosion.
Can a sound-based cleaner alone fix saltwater damage?
It is effective for ejecting standing liquid, but any residue left after drying may need a gentle brush cleaning in addition. If actual corrosion has set in, sound alone will not reverse it.
Will my phone’s water resistance rating protect it from saltwater?
Most consumer water resistance ratings are tested primarily with fresh water under controlled lab conditions, not extended saltwater exposure. Treat any saltwater incident seriously regardless of your phone’s rating.
How do I know if the speaker damage is permanent?
If sound does not improve at all after proper rinsing, drying, and several cleaning cycles — or if it improves and then worsens again — that pattern suggests corrosion rather than simple trapped moisture, and professional inspection is the next reasonable step.
Final Thoughts
Saltwater genuinely earns its reputation as one of the more serious things that can happen to a phone speaker, but “more serious” does not mean “hopeless.” The single most important difference from a plain splash is the fresh-water rinse step — a brief, deliberate rinse that dilutes and removes salt before it has the chance to crystallize and cause lasting harm. Combined with prompt drying and a few rounds of low-frequency sound ejection, most saltwater-exposed speakers can still make a full recovery.
The key is speed and the right sequence: rinse, dry, eject, and watch closely for any signs that the damage has moved past simple moisture. Handled quickly, a day at the beach does not have to mean a trip to the repair shop.