How to Clean Phone Speaker Without Opening It
Muffled calls, quiet notifications, and music that suddenly sounds thin usually point to one thing: dust and lint have built up in your phone’s speaker grille. The instinct to reach for a screwdriver is not necessary, though — and honestly, opening a modern phone yourself risks far more damage than the dust ever would. Every method in this guide works entirely from the outside, using tools you likely already have at home.
Why Opening Your Phone Is Not Necessary
The speaker grille — the small perforated area you see on the outside of your phone — is only a few millimeters from the actual driver, but that short distance is exactly where dust, lint, and debris get trapped. In the vast majority of muffled-speaker cases, this surface-level blockage is the entire problem. Once it is cleared, sound quality returns to normal without needing to go anywhere near the internal components.
Opening a modern smartphone typically involves adhesive seals, tiny screws, and fragile ribbon cables — risks that far outweigh the benefit for what is usually a simple dust problem. Every method below works from the outside only.
Before You Start: Locate and Inspect Your Speakers
Most phones have at least two speaker openings: a bottom-facing loudspeaker (used for calls on speakerphone, music, and alarms) and a smaller earpiece speaker near the top of the screen, used for regular calls. On many recent iPhones, the loudspeaker and microphone sit on either side of the charging port. On many Samsung and Android phones, it is in a similar bottom position, with the earpiece speaker at the top of the display.
Turn off your phone, and use a bright light or a flashlight to look closely at each grille. Visible fluff, dark buildup, or a slight sheen suggesting moisture are all signs that cleaning will help.
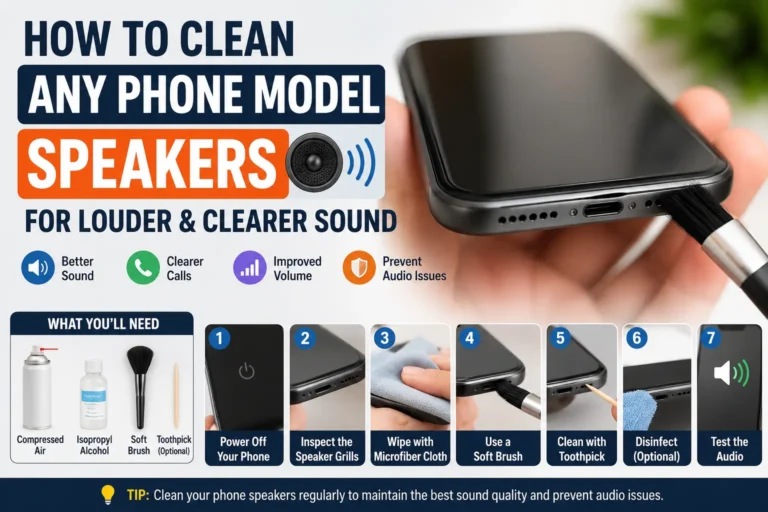
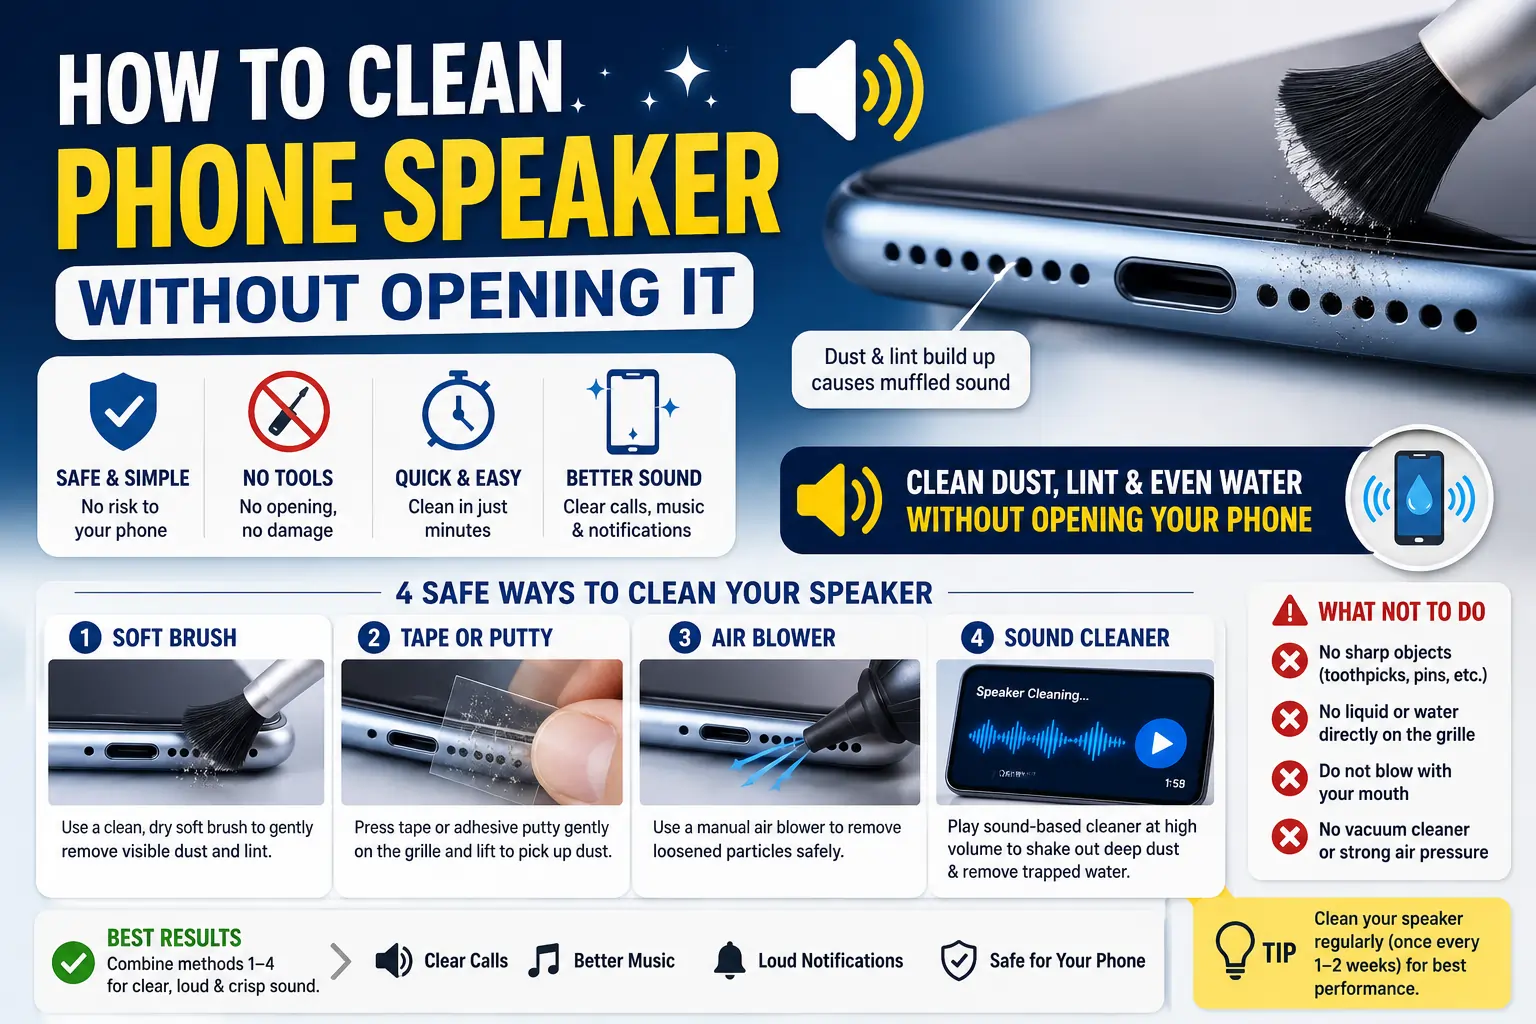
Method 1: Soft Brush
This is the method both Apple and Samsung officially recommend, and it is the safest place to start.
- Turn off your phone.
- Use a clean, dry, soft-bristled brush — an unused toothbrush or a small makeup brush works well.
- Brush gently across the grille in one direction, using only the tips of the bristles rather than pressing them into the holes.
- Hold the phone with the speaker facing downward so loosened debris falls away instead of settling deeper.
- Lightly tap the phone afterward to shake out any remaining loose particles.
Method 2: Sticky Tape or Adhesive Putty
This trick works almost like a lint roller for your speaker grille, and it is especially effective at lifting out fine particles a brush alone might miss.
- Cut a small piece of clear tape, or use a bit of non-residue adhesive putty (the kind used for cleaning keyboards).
- Roll the tape lightly on itself with the sticky side facing out, or flatten the putty slightly.
- Press it gently against the speaker grille — do not push it into the holes.
- Peel it away slowly. You should see lint and dust lifted onto the tape or putty.
- Repeat with a fresh piece until it no longer picks up visible debris.
Avoid strong adhesives like duct tape, which can leave residue behind on the grille.
Method 3: Compressed Air or an Air Blower
Note: Apple specifically advises against using canned compressed air on iPhones, since the pressure can push debris deeper or damage delicate internal components. A manual rubber air blower (the kind used for camera lenses) is a gentler and safer alternative if you want an air-based method.
- Hold the phone with the speaker grille angled downward.
- Give short, controlled squeezes with the air blower a few centimeters from the grille.
- Avoid pressing the nozzle directly against the speaker.
- Follow up with a soft brush to clear any dust that has been loosened but not fully ejected.
Method 4: Sound-Based Speaker Cleaning Tools
This is the most effective option for dust or moisture sitting deeper in the grille than a brush or tape can reach, and it is entirely external — no physical contact with the phone at all.
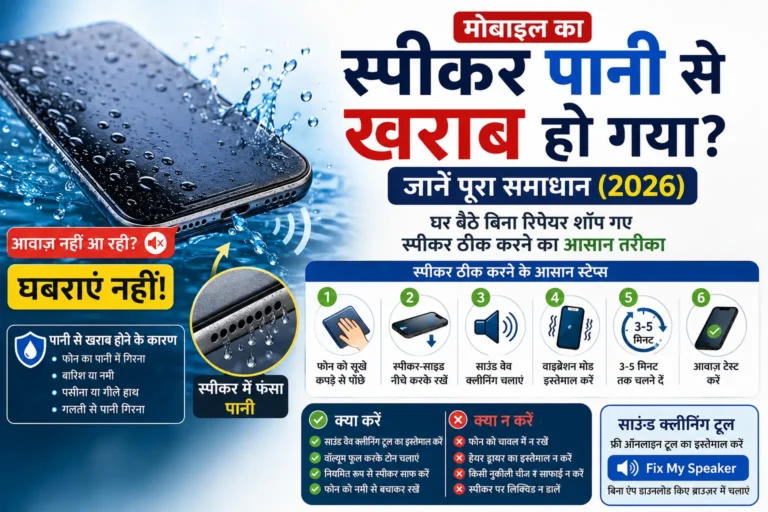
These tools work by playing a calibrated tone through your phone’s own speaker, causing the diaphragm to vibrate more forcefully than normal playback. That vibration physically shakes loose dust and, if present, pushes out trapped water through the mesh.
- Open a sound-based speaker cleaning tool in your phone’s browser — most run with no download needed.
- Set your phone’s volume to a high level, since the vibration relies on volume to be effective.
- Hold the phone with the speaker facing downward.
- Start the cleaning cycle and let it run fully, usually somewhere between 30 seconds and two minutes.
- Wipe the grille with a dry cloth afterward, and repeat once or twice if needed.
Watch: Cleaning a Phone Speaker Without Opening It
If you would like to see one of these methods demonstrated, this video walks through a simple external cleaning technique using tape:
📺 Video: How to Clean Phone Speaker Without Opening It
https://www.youtube.com/embed/EYeman4knu4
Combining Methods for Best Results
In practice, the most effective approach usually combines more than one method rather than relying on a single technique:
| Order | Method | Purpose |
|---|---|---|
| 1 | Soft brush | Loosen and remove visible surface debris |
| 2 | Tape or adhesive putty | Lift out fine particles missed by brushing |
| 3 | Sound-based cleaning tool | Clear deeper dust or trapped moisture |
| 4 | Final wipe with dry microfiber cloth | Remove any remaining loosened residue |
If, after one or two cycles of this combo, the speaker sounds noticeably better, you are done — there is no need to repeat the process daily or obsess over a perfectly spotless grille.
What NOT to Do
- Do not use toothpicks, needles, paperclips, or tweezers. These can tear the speaker mesh or damage the diaphragm underneath.
- Do not apply water or liquid cleaners directly to the grille.
- Do not blow into the speaker with your mouth. This adds moisture rather than removing debris.
- Do not use a vacuum cleaner directly on the grille. The suction and static can damage delicate internal parts.
- Do not over-saturate a cotton swab with rubbing alcohol near the speaker, since excess liquid can seep into the openings.
How to Tell If Cleaning Actually Fixed the Problem
After cleaning, test properly rather than just assuming it worked:
- Play a song you know well, so any remaining muffling is easier to notice.
- Test the left and right channels separately if your phone has stereo speakers.
- Compare the volume needed for a comfortable listening level before and after — needing less volume is a good sign.
- Try both the built-in speaker and headphones to confirm whether the issue was hardware-related in the first place.
When It Is No Longer a Cleaning Problem
If you have tried brushing, tape, and a sound-based tool, and the speaker still sounds the same or worse, a few signs point toward something beyond simple dust buildup:
- Strange clicking, buzzing, or crackling that was not present before
- Sudden total silence rather than gradual muffling
- No improvement at all after multiple gentle cleaning attempts
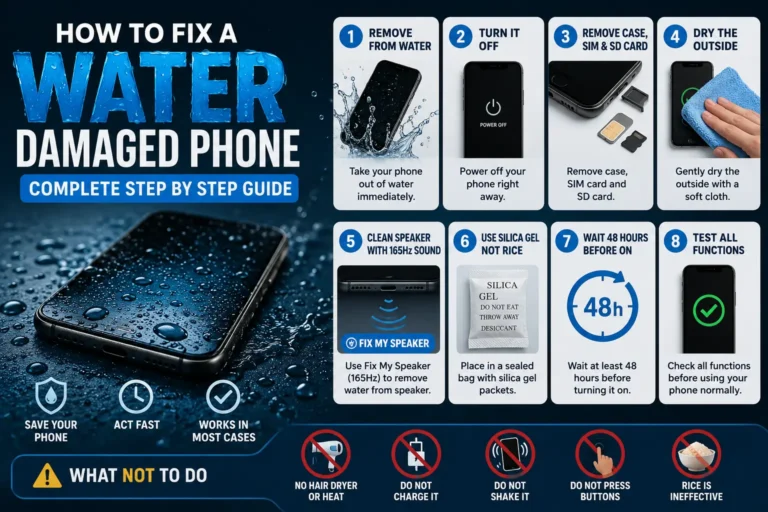
- Recent water exposure beyond a light splash
At that point, continuing to force cleaning attempts increases the risk of causing damage rather than fixing anything. It is a reasonable point to consider a technician, who can safely access internal components if needed.
Frequently Asked Questions
Can I really clean my phone speaker without opening it?
Yes, in the vast majority of cases. Most muffled speaker issues are caused by dust or lint sitting in the external grille, which brushes, tape, air, and sound-based tools can clear without ever needing to access internal components.
Is it safe to use a toothbrush on my phone speaker?
Yes, as long as it is a clean, dry, soft-bristled brush used gently. Apple and Samsung both officially recommend this method for speaker grille cleaning.
Why should I not use compressed air on my phone speaker?
Apple specifically warns against canned compressed air, since the pressure can push debris further inside or damage delicate components. A manual rubber air blower is a gentler alternative if you want an air-based method.
How often should I clean my phone speaker?
For everyday use, once every one to two weeks is reasonable if you use your phone heavily or keep it in a pocket often. Lighter users can typically get away with once a month.
What if cleaning does not improve the sound at all?
If none of these external methods make a difference after a couple of attempts, the issue may be a software setting, a driver-level problem, or genuine hardware damage rather than dust — at which point a technician’s diagnosis is the next reasonable step.
Final Thoughts
Cleaning a phone speaker without opening it is not just possible — it is actually the safer and more effective first step for almost every muffled-sound complaint. Start with a soft brush, add tape or a sound-based tool if needed, and test carefully afterward. In most cases, your phone’s audio will sound noticeably clearer within a few minutes, with zero risk to the internal hardware.